Wednesday, October 15, 2014

Carnivorous Cupcakes with Sweet potato frosting

I've recently changed my diet in life and have been taking the grains and processed sugars down. I had a moment in my kitchen one day when  I realized how much bread, oats, and granola I was eating. Actually, it was all I was eating. So, I did some research and decided I would start cooking more. I would cook more meats, eat more fresh vegetables, and be aware of what my body does well with. I by no means have gone hardcore gluten free (pizza and movies last night...duh), but I am making an effort to stay further away from processed foods and extra sugars. This has put a damper on my baking. And I am well aware of the Paleo world of sweets but I've intentionally stayed ignorant to them because I lack the time and money to plunge into that world. Maybe one day, but not today.

Anyways, I've started a new life in Georgia and my chapter includes the spawning of new relationships with classmates and the people in my world. It has been wonderful. Seriously. I am actually sad this first semester is coming to an end because I know this is gonna create a shift in the dynamics but onward and upward.

These cakes are for a classmate who has some inspirational eating habits. We have a precedent set that someone bakes for a classmates birthday and I picked this chance to make a special cake. Here are some manly meat cakes for those non sugary friends of ours. I really feel weird calling them meat cakes...it just sounds like something you shouldn't offer to a stranger. I digress.

Carnivorous Cupcakes (with Sweet potato and Cauliflower frosting)
**Start the frosting early. If you only have one cooking source, it behooves you to get the potatoes done early in the day**
  • 2 lbs ground Turkey
  • 2 medium carrots, shredded
  • 1/2 red onion, chopped
  • 3 celery stalks, chopped
  • 2 eggs
  • 1/2 C Panko bread crumbs (I used a gluten free version here, but you could use regular)
  • 1-2 Tbls ground sage
  • 1 tsp onion powder
  • 2 tsp garlic powder
  • 1 tsp dried basil
  • 1 dash cayenne pepper
  • salt and pepper
As always, heat the oven to 350. 
Now, get that meat into a bowl and throw in all those wonderful vegetables. The ratio will look kinda funky but remember, veggies are your friend. They should be abundant. Add the seasonings and feel free to adjust these to your favorite meatloaf seasonings. Give it a good mix with your hand till everything is incorporated. Next, add the eggs and panko, then mix again.

Here, you can do a bit of variaton. I wanted these things to look nice since they are for someone's birthday. So I lined a muffin tin with a paper liner and filled it with the meatloaf mix. Seriously, mush that stuff in there. If I were making these for just me, I would just grease the muffin tin (depending of the fat content of my meat) and bake them. I didn't necessarly want a domed cake so I mushed it flat and tossed it into the oven for about 20-25 minutes. If you are NOT making these as a prep meal, go ahead an let them cook for 30-35 minutes. I wanted mine close to the line of undercooked since they are gonna be reheated later and microwaves murder turkey moisture (as if turkey is moist anyways).

You should get about 18 cakes total after the baking.

Sweet potato and Cauliflower frosting
-1 large sweet potato
-1 small head of cauliflower
-1/4 C cream/milk/cow juice
 -Cinnamon

Seriously, you will have left overs. Especially cauliflower.
This might take a bit of prep but I love sweet potatoes and figured it would totally worth it. Plus, I only have one cooking source so I roasted my potatoes way earlier in the day.
Start by wrapping your sweet potato in foil individually. I cut the ends off of my potato to help me later. Throw that sucker into a oven that has been heated to 400 degrees F for about an hour (you can give the foil a squeeze WITH AN OVEN MIT ON to check if the potato is soft after the hour. If not, keep baking). You should start getting the cauliflower mash ready here. If you have your own way, good, do that. If you have never made mashed cauliflower, try this.

Start by cutting the head of cauliflower into smaller pieces (flowerets) and put them into a veggie steamer (of if your cheap like me, just boil them). Test them with a fork after about 10 minutes. They should be tender if they are done. If not, keep boiling. Once the cauliflower is cooked use either a food processor, blender, or some device to "rice" the cauliflower. After that, add the cream and if you wish some butter. The cauliflower wont look like potatoes but if gives a different texture to the sweet potatoes. Which are probably done at this point. 
Pull those potatoes out of the oven and let them cool. After they are cooled, take a knife, make a line just through the skin length wise down the potato (ya know, fold the paper hot dog style? same thing). you should be able to just peel the skin off the potatoes from this point. Mash that thing up and toss it into a piping bag with some cauliflower. I tried to get all creative and do half of the bag sweet potatoes and the other half cauliflower mash. In retrospect, I would have just added the cauliflower the the sweet potatoes till I got a consistency I liked. 
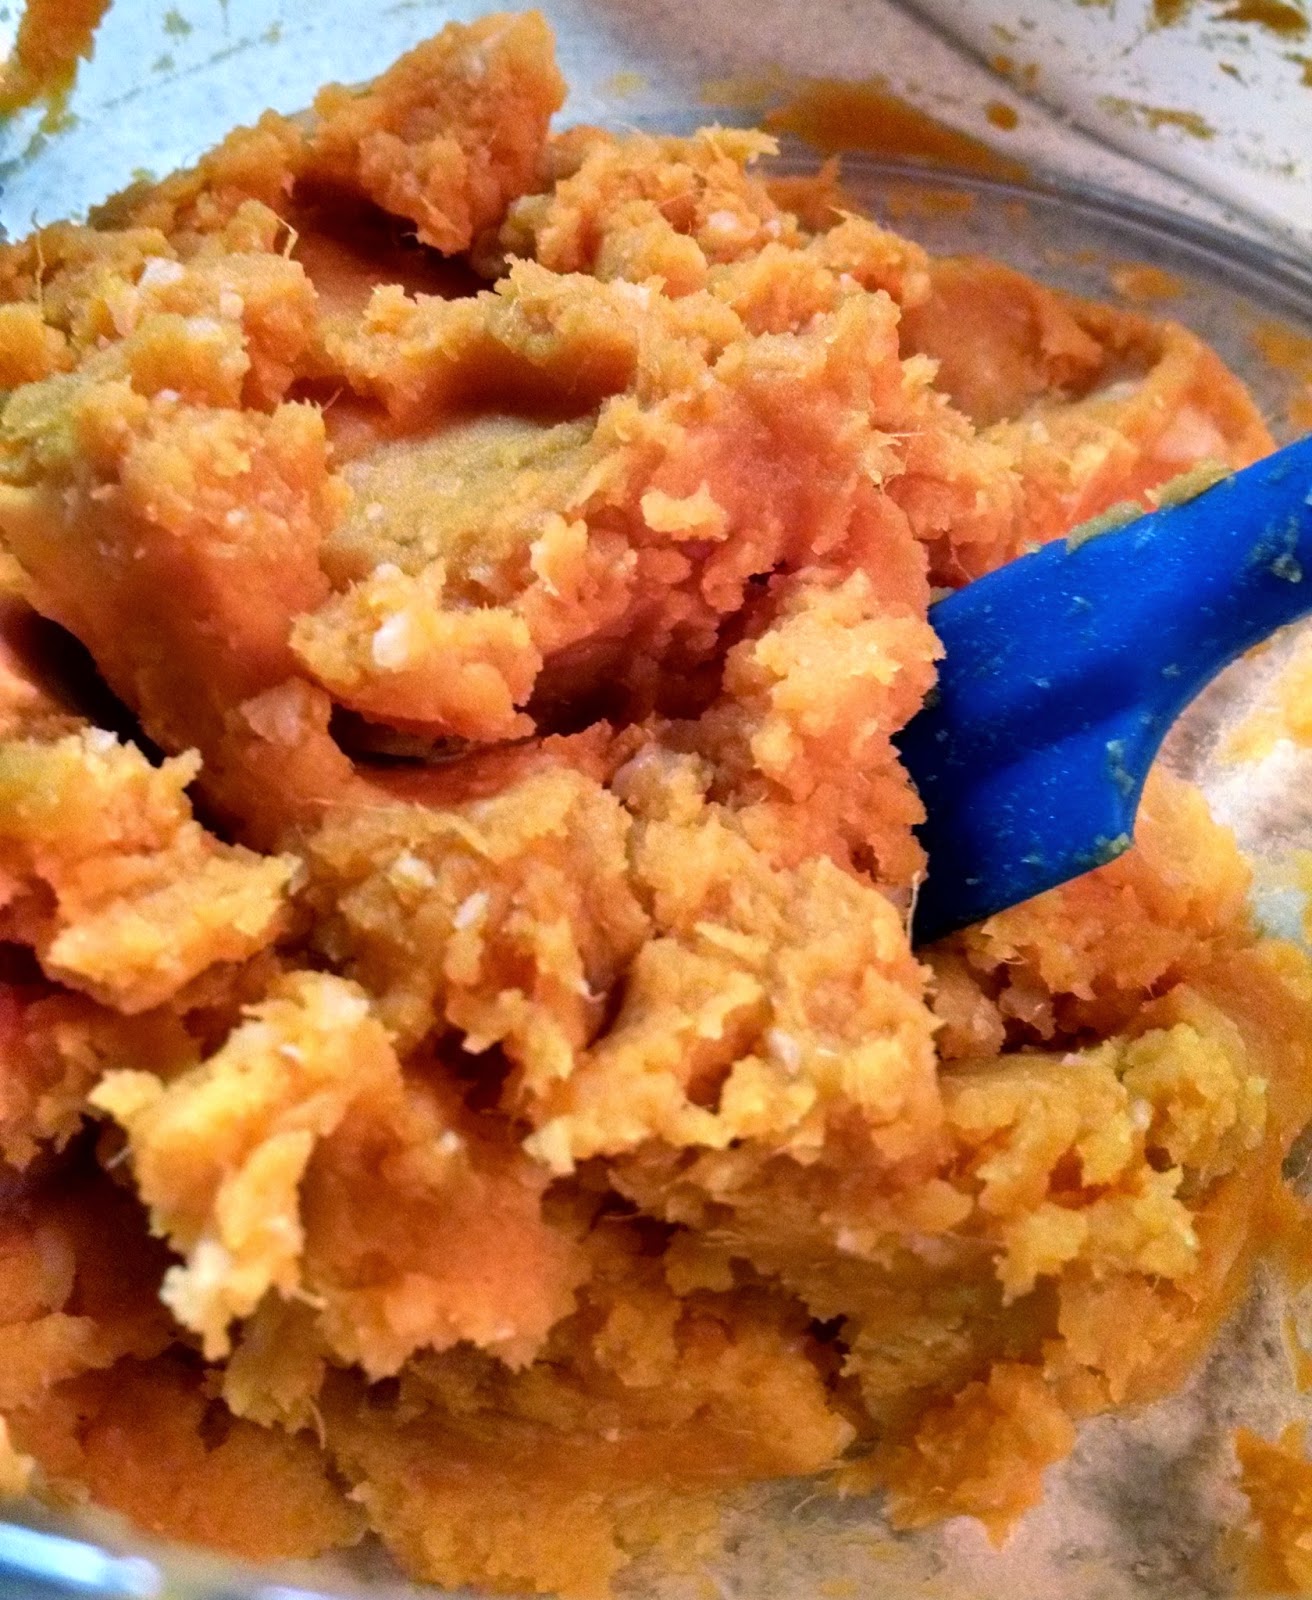
Pick your frosting tip and decorate away. 

I will definitely make these again for myself because this seems like an incredibly easy way to get lunch prepped for a week.

Till next time.

Tuesday, August 5, 2014

Paint It Black, sorta.

I've never been very good at art, not until recently. My theory is that I haven't gotten better at art, I just stopped caring about how imperfect things looked and went for it. I took running after painting my wall in one of the rooms I rented in Colorado. My amazing friend/roommate/landlord Patrice allowed me to paint a wall in my room with a picture I had fallen in love with. You can see the work here. She also kept it after I moved out and still likes to show people when they come over like a proud mother.

My second project came from a broken picture frame that was intended for a calendar. After moving to a new apartment, the glass shattered and I was stuck with a frame. So I found some fabric at the thrift store, bought some foam board from Wal-Mart, and set out to make my own jewelry board.

dem jewels 

I started by painting the fabric first. I just picked a place and started out with a rough drawing. I don't mean rough like loose, I mean rough like ugly as sin. It was my first free hand and I decided if it looked like dog poo at the end, I would trash the whole project and pretend it never happened.

Look at that rough
I've always loved feathers. There was a time in my life where I wanted feathers tattooed on the back of my triceps and maybe one day in the future, but for right now I am happy to settle with the painting.

After drying for a day, I stretched the fabric over the foam board (already cut to size for the frame) and put the whole thing into place. I trimmed the fabric up on the back leaving about 1-2 inches and stapled the excess with a regular office stapler. Then I hung the frame, inserted sewing pins and hung my bling.


Here is another board I made for a friend. This one is just a simple burlap canvas with foam board inserted in the back. This was my second freehand and based off a picture she was obsessed with at the time. 


Until next time.

Friday, July 25, 2014

Gone baby gone and an Arnold Palmer

First off, I am horrible at commitments. Good thing I don't have throngs of followers or this absence could have caused an uprising. I wish I could say this is the end of my neglect dear blog, but Graduate school is starting soon and I am feeling as though my 400 sq ft apt will not make for the best baking facility. BUT, today, of today ladies and gents, I have for you, a golf classic turned cake. Arnold Palmer!

I found this recipe as I thumbed through my mother's Southern Living. Almost followed the exact recipe but I did make one change. Here is their original recipe:

Southern Living Sweet Tea-and-Lemonade cake
Shortening
1 1/2 C boiling water
3 Family sized tea bags
1 C butter, soften
2 C granulated sugar
1/2 C firmly packed light brown sugar
5 large eggs, room temp
3 1/2 C cake flour
2 tsp. baking powder
3/4 tsp. table salt
1/4 tsp. baking soda

Now, I hate cake flour. I have never, ever, literally ever had any success with it. So I chose not to use it and make the conversion with all purpose. I followed the directions here. As a warning, it might change the way your cake turns out. There is a whole explanation here. Bake at your own risk.
Also, if you are making cupcakes, you do not need the shortening. Just get those cupcake liners out and loaded into the pan.

First, Boil the 1 1/2 C water and pour them over the tea bags in a heatproof bowl. Cover with plastic wrap and let it steep for about 10 minutes. Remove the tea bags and let the liquid cool (room temperature is fine) for another 20 minutes. You will only need 1 C for the cake batter.

Preheat the oven to 350. Beat the butter until creamy then slowly add the sugars in, beating until fluffy. Add the eggs one at a time and make sure it is blended well before adding the next egg. In a separate bowl, combine flour (cake or not), baking powder, salt, and baking soda. Alternate adding the flour mixture and 1 C of tea to the butter batter.

This is important. These cakes do not rise as much as normal cupcakes. They rise, but not that much. Fill the cupcake papers with a little more batter than average. Then bake for about 13 minutes. Let them cool and start on the frosting.

Lemonade Frosting
1 8oz. cream cheese, soften
1/4 C butter, soften
6 C powdered sugar
1 TBSP lemon zest
3 TBSP fresh lemon juice

Mix the cream cheese and butter with an electric mixer until creamy. Slowly add powdered sugar a cup at a time. Once the frosting is all incorporated, beat in the lemon zest and lemon juice. Beat on a high speed until light and fluffy.

I chose to do a rough frosting on my cakes for the look. The frosting is sweeeeeet so you don't need too much.


This is the first time in over a year I have made regular sized cupcakes. No regret, but I still favor mini cupcakes.
 

I hope I keep up blogging this time. I will try my hardest. 

Until next time!


Tuesday, November 26, 2013

Savory cakes

I've had a pretty interesting last 7 months out in Colorado. I've had the opportunity to meet some pretty awesome people who have taken me out on some pretty sweet adventures. I've been to a Lumberjack celebration, my first real concert at Red Rocks, a sweet bike race in Steamboat, an epic 13 mile hike up Pikes for Brain injury awareness, and my first night hike just to name a few. I really am blessed to be in the midst of the best years of my life and have good people around me. Or as my new roommate likes to call them, The Crew.
1st night hike

Last week I was invited to a friend's Thanksgiving, formally known as "Skanksgiving". Lucky for us, there was nothing skanky there. Anyways, I decided I was going to make a cupcake for the occasion and wanted to try something savory. I spent some time scouring the internet before realizing there wasn't going to be much help out there.

I settled for a butternut squash cupcake from Vanilla Garlic but when I got to the store, I switched gears completely and decided I was going to try something weird. 
 
At the end of the night a min stuffing cupcake was born
  This is an adaptation from the Brown Eyes Baker

Savory Cupcake
1 C flour
1/2 C savory herb stuffing mix
1 C granulated sugar
1 1/2 tsp baking powder
1/2 tsp salt
1 tsp thyme
8 Tbls (1 stick) butter (room temperature)
1/2 C sour cream
1 egg (room temperature)
2 egg yolks (room temperature)
1 1/2 tsp vanilla extract
1 Tbls brown sugar

Heat the oven to 350 degrees F and line out the cupcake tin with liners. It should be noted that I am still baking in minis, so please adjust baking time accordingly.

I bought a pack of dry Stove Top stuffing and put it in a food processor until I had a fine flour. You will have more than 1/2 C so remember to measure out after getting the flour.

Combine the flour, stuffing flour, baking powder, salt, and thyme in a large mixing bowl. *Other note, next time I make these I am going to omit the salt. I felt that the stuffing flour contributed enough salt but I'll post an update after the second batch. If you have a standing mixer, toss on the paddle attachment and add the butter, sour cream, egg and yolks, vanilla, and brown sugar. If not, start to get those arms warmed up. Mix until well combine and smooth.

Divide the batter into the lined tins. Bake at 350 for about 9 minutes. AGAIN, I am using minis, so PLEASE adjust bake time accordingly. As always, test the center of the cake with a toothpick.

Savory Buttercream Frosting
1 C butter (room temperature)
3 C powdered sugar
1 Tbls Vanilla extract
2 Tbls milk/heavy cream
1 Tbls 1 tsp rubbed sage (run through food processor)
2 tsp thyme
Dried Cranberries*

Beat the butter until it begins to fluff. With mixer on a LOW speed, slowly add the powdered sugar 1/2 C at a time until incorporated. After all the sugar is added, increase the mixer speed and add the vanilla and milk/cream. Finally, add the sage and thyme. Mix and adjust seasoning to taste. You want it to be smooth, earthy, and sweet.

Frost the cupcakes and garnish with the meatiest (literally the best adjective I could use) dried cranberries you can find.
Meeeaty

Until Next Time

Monday, October 21, 2013

Maple Baconator

Somewhere along the line we started a running joke at work that we were going to have a bacon party. Literally just pounds and pounds of bacon cooked in a variety of ways. Last night, our jokes turned into reality as 15 people joined together to create the most epic of dinner parties. We had Bacon beer mac n cheese, Lobster mac n cheese, Bacon wrapped Tennessee whiskey chicken, Candied bacon, Bacon wrapped stuffed mushrooms, Bacon vegetable cheddar soup, Bacon cheddar chive biscuits, and finally Maple bacon cupcakes. It was awesome. Someone even found Bacon soda, which was literally the only bad tasting item on the table. 

While searching for a starting point for maple cupcakes, I was continually redirected to Vanilla Garlic's website (original recipe found here). It was said to be the best maple cupcake on the web, so I had to try it with a little twist of my own. I doubled the recipe and made minis for the party, which cranked out about 70ish little cakes. 

Maple Bacon Cupcakes
Makes 12-16 / 350F oven

9 tablespoons butter, (room temp)
1 tablespoon bacon drippings (solidified)
2 egg, beaten (room temp)
10 tablespoons brown sugar
8 tablespoons Grade B maple syrup
2 1/2 cup flour
2 teaspoon baking soda
1 teaspoon baking powder
minuscule pinch kosher salt
1/2 cup buttermilk
1/2 cup minced bacon, cooked and drained (extra for garnish, if desired)

Start with the butter and bacon and whip it....whip it real good. Once it looks incorportaed and whippy, add the two beaten eggs, followed by the brown sugar and syrup.

In a seperate bowl, add and sift together the flour, baking soda, baking powder, and salt. If you are broke like me, simulate sifting by gently tossing the ingredients with a fork. 

Slowly add the flour and buttermilk, alternating between the two in 3 batches. Once the batter looks thick and well mixed, gently fold in the bacon. 

Divide the batter into cupcake liners and bake for 8-9 minutes (**I am using minis AND I am baking in high altitude). Check the cakes by inserting a toothpick and praying it comes out clean. Set those puppies aside to cool. 

Maple Frosting

8 tablespoons butter (room temp)
1 tablespoon bacon grease (solidified)
5 tablespoons Grade B maple syrup
2 cup of powdered sugar

Whip the crap out of the butter and bacon grease. Add the maple syrup and let the frosting and continue to beat on high for about 2 minutes or until it there is a good amount of air incorporated. Lower the speed and slowly add the powdered sugar. I believe once I added all the sugar, I let the frosting beat on high for about 3 minutes to get a really fluffy batch. 

Finally frost and garnish with Bacon.


I dipped my bacon in chocolate and wished I had large sea salt to add. Either way, the final product was awesome. 

Till Next Time

Monday, July 29, 2013

Peanut Butter Chocolate Awesome

Once during my senior year in high school, a teacher made a comment about how chocolate was better than sex. She stated that "chocolate is better than sex because you know chocolate never disappoints." Besides this being completely inappropriate it has fueled my desire to make a better than sex cupcake. And I think I've finally nailed it (pun intended). 

I used my favorite chocolate cake recipe, the Guinness cake from a previous blog. I found the peanut butter frosting recipe online after a bit of digging. You can see the original recipe on Beyond Frosting's Wordpress.

Chocolate Cupcake:
1 C buttermilk 
1 C butter (room temp)
3/4 C coco powder
2 C flour (all-purpose)
2 C granulated sugar
1 1/2 tsp baking soda
3/4 tsp salt
2 eggs
2/3 C sour cream

Preheat your oven to 350 degrees and line out 24 cupcake tins with liners. Combine buttermilk and butter in a saucepan over medium heat. Whisk in coco powder until mixture is smooth. Set the saucepan aside.

In another bowl mix flour, sugar, baking soda, and salt in a bowl and set it to the side. In a large bowl beat eggs and sour cream till combine. Add the chocolate butter mixture, then slowly add the dry ingredients and mix till incorporated. 

Fill the cupcake liners two-thirds full with the batter. Pop them into the oven for about 15-17 minutes or until a toothpick comes out clean. Set the cakes to the side and allow them to cool. 

Peanut Butter Frosting:
1 1/2 C unsalted butter (room temperature)
1 C peanut butter 
3 C powdered sugar
1 Tbsp heavy whipping cream

First, whip the crap out of the peanut butter. I kept adding peanut butter to the bowl so it was roughly 1 1/2 cups. Beat the peanut butter until it is fluffy. There will be a color change and the texture will look like whipped butter. Slowly add the butter to the mixture and continue to beat on high. You really want to fill the frosting with air. Once everything looks nice and light, lower the speed of the mixer and begin to add the powdered sugar. Finally, after the sugar is well incorporated add the heavy whipping cream and continue to beat the frosting until you reach a desired consistency. 
 Give them nice full tops so that when you add the chocolate cap it will have a nice billowed look. 

Once frosted, put the cupcakes into the fridge. The frosting is going to need to be chilled in order to hold up to the caps. 


Chocolate Cap:
2 C chopped semisweet chocolate
3 Tbls vegetable oil

Prepare a double boiler. In the top bowl add the chocolate and oil. When the chocolate begins to melt whisk the mixture until the chocolate is smooth and completely combine. Transfer the chocolate into a cup deep enough for dipping the cupcakes in to cap the chocolate. Remove the frosted cakes from the fridge and begin dipping.  


Then, muster up all the patience you can and wait for the caps to harden.

Mounds of Vegan Joy

On my way out to Denver I decided I wanted to make an Almond Joy inspired cupcake. The first attempt was such an awful fail that I stepped away from baking for a few days. It was awful. So once I got the confidence to try again, I decided to do a vegan twist. I disliked the heaviness of the first vegan cake I made so I searched out a fluffy vegan recipe for coconut cake. I tried a cake from Chloe Coscarelli  and was not disappointed. Her original recipe can be found by following the link, below is what I used. The changes are noted by an asterisk.

Coconut Cake:
1 3/4 C all-purpose flour
1 C sugar
1 tsp baking powder
1 tsp baking soda
1/2 tsp salt
1 C coconut almond milk*
1/2 C canola oil
1 Tbls vanilla extract*
1 Tbls coconut extract*
1 Tbls white or apple cider vinegar 
1 C shredded coconut*

Preheat the oven to 350 degrees and line out the cupcake pan. 

In a large bowl combine the flour, sugar, baking powder, baking soda, and salt. In another bowl, whisk the coconut milk, oil, extracts, and vinegar. Add the wet ingredients to the dry and whisk until combine. Don't over mix, it will lead to flat lifeless cakes. 

Fill the cupcake liners two-thirds fill and bake for about 15 minutes or until a toothpick comes out clean. Let the cakes cool and start to work on the frosting. 

Chocolate Almond Frosting:
6 Tbsp soy margarine
3/4 C cocoa powder
2 2/3 C organic powdered sugar
1/3 C chocolate almond milk
1 tsp almond extract

Combine cocoa powder and powdered sugar in a bowl. In a separate bowl cream the margarine. Add the dry ingredients and almond milk, alternating between the two. If you want a fudgier consistency, add more milk. Beat in the almond extract. 

Now, get to frosting. 


Wednesday, July 10, 2013

Baked?

This is not a post about a baked good. I wanted to let the world know that I haven't abandoned blogging or baking, I just needed to get some other things taken care of before diving back into a cupcake excursion. Financial priorities or something like that. Anyways, I've been stalling on painting my room for some time now. I was on a search for an overhead projector because the image I wanted to put on my wall is too intricate for me to free hand. Luckily, I found one this week and decided to stall no more. 
This is the original photo

This is my naked wall

This is the end of day one. 
 I am stoked to see how this turns out. 

Also, here is a picture of a chocolate filled croissant from dinner the other night. Boom, baked goods :)

Monday, June 17, 2013

Velvet Is the new Chocolate

I tackled a Red Velvet cupcake with a bit of apprehension. Prior to a week ago, I had never eaten a Red Velvet cupcake and never had much of a desire for one either. But, upon the request of someone at the gym, I thought I should give it a try. I started my cupcake exploration at a German bakery outside of town. And it sucked. More suck than eating last year's Halloween candy on Easter. Yes, that disappointing. I've never had a desire to eat Red Velvet cupcakes because I've never understood what it was meant to taste like. It seemed like this whole red drink purple drink issue but in cake form. This disappointing cake only fueled my decision that Red Velvet cake was a waste of flour. When my roommates took me to Yogurtland the next day, I tried the Red Velvet and realized how sad I was that I had missed out on this for 24 years.


I started searching online and figured my best option was to just dive right in. I stumbled upon this gem from the parsley thief and thought I would test it out. 

Spoiler alert, it was amazing.


Cake
1 cup plus 2 TBLS flour
1/2 tsp kosher salt
2 TBLS unsweetened cocoa powder
2 TBLS red food coloring
1/2 tsp vanilla extract
1 TBLS water
4 TBLS {1/2 stick} unsalted butterroom temperature
3/4 cups sugar
large egg
1/2 cup buttermilk
1/2 tsp baking soda
1 1/2 tsp distilled white vinegar

Preheat the oven to 350F and line out the cupcake pan. Combine the dry ingredients (flour and salt) and set them to the side.

In another small bowl, mix the coco powder, red food color, vanilla extract, and water with a spoon until it is smooth and looks like a very thin paste. If you run out of food coloring (like I did) you can substitute a little bit of yellow and use water as the rest of the filler. I think I ended up using a 1/2 TBLS red, 1/2 TBLS yellow and 1 TBLS water. Set this weird red paste to the side.

Beat the butter and sugar until it is light and fluffy then add the egg and beat until it is incorporated. Add the red paste to the batter and mix it on a medium speed until it is well combined. Add the buttermilk and dry ingredients, alternating half and half and beat until smooth. Add the baking soda and white vinegar, beat once more until smooth. I've never baked with these two ingredients, but I combined mine before adding them into the batter and it worked out pretty well. Follow the beat of your own heart.

Finally, divide the batter between the liners and bake for about 15-20 minutes, checking with a toothpick or knife to see if it comes out clean. Let them cool, despite the deep desire to ingest immediately.

Frosting
8 TBLS {1 stick} unsalted butterroom temperature
4 ounces cream cheeseroom temperature
2 1/2 cups powdered sugar
1/2 to 1 TBLS vanilla extract

Add your butter and cream cheese to a bowl and beat until combined (about 5 minutes). SLOWLY add the powdered sugar and the vanilla extract to your liking. Beat until light and fluffy. I trust that most of you have made frosting and have full faith of your capabilities to make frosting.

Frost your cakes and decorate as you wish. Or just eat at 12 of them in your PJs and tell no one after, your choice.

Until Next Time


Tuesday, June 4, 2013

Vegan ventures

I decided to take on the challenge of making a vegan cupcake. Really, I wanted to thank the guys at my gym for hooking me up with such an amazing deal when I signed up. What better way to show my appreciation than with baked goods. So I was given the vegan stipulation and set to work.
Since it is Summer I really wanted to do something light, which then turned into I want to make something edible cause I have no clue how this vegan business is gonna work.

End result? Strawberry cupcake with Basil Lime buttercream.


Strawberry cake

4 C all purpose flour
3 tsp baking soda
1 tsp salt
2 C sugar
1/2 safflower oil
2 C pureed fresh strawberries
1/2 C coconut milk
2 tsp strawberry extract
2 tsp vanilla extract
Red or pink food coloring

Preheat the oven to 350 F. Combine the flour, baking soda and salt into a bowl and set aside. In another bowl combine sugar and oil, then the puree. Add the remaining liquids (and yes, use the food coloring!) Once well mixed slowly add the dry ingredients and be cautious of over mixing. I threw in some sliced strawberries at the end for the texture and color. If you choose to, fold them in gently before dividing batter into cupcake tins.

Next, get your handy ice cream scooper and fill your lined cupcake tins with this epic pink gooey mess. Bake for about 12-15 minutes. *disclaimer, my baking times are all goofy in the altitude so just do a quick check at about the 12 minute mark using a knife or toothpick.

Basil Lime frosting

1/2 C vegan butter (room temperature)
2ish C powdered sugar
2 TBLS coconut milk (room temperature)
Fresh basil (to taste)
1 lime (squeezed)
splash of vanilla extract

Start with the butter soften in a bowl. Here it awaits the powdered sugar. SLOWLY add your powdered sugar to the bowl while beating the butter (just like regular buttercream). Alternate between adding the powdered sugar, coconut milk, lime juice and vanilla extract until you have a smooth creamy consistency for the frosting. Feel free to add or omit powdered sugar based on how you prefer frosting. Here is the "to taste" part. Fresh basil, roughly chopped, and folded into the buttercream awesome. I think total I used maybe 6-10 leaves, all in various sizes. This part is totally up to you, but don't be shy. It is a good contrast to the tart lime and sweet buttery sugar you have just whipped up.
*Another disclaimer, this was originally going to be a different frosting instead of a heavy buttercream but in my vegan fail I returned to what I knew. Hope to have an update soon with a non vegan version of this.

From here, you know the drill. Let the cakes cool and frost that cake top like it's your day job. USE A WIDE TIP, otherwise the basil gets stuck. And that is just no fun.

Till next time!


Tuesday, April 23, 2013

Baked French Onion Soup

This new elevation has completly messed with my baking. I attempted to make Guinness cake last week and the bake time was all screwy. With mouths full of cake my new roommates said it was great, but I walked away a bit discouraged. I plan on jumping back on the baking horse soon with some cool stuff, but it will be in a few weeks.

Other news, we make homemade meals around here like it is a hurricane party. So, tonight I thought I would share my baked french onion. I used a Tyler Florence recipe from Food Network and slightly altered a few things (noted with *).

1/2 cup unsalted butter
4 onions, sliced
2 garlic cloves, chopped
2 bay leaves
*2 sprigs fresh thyme 
Kosher salt and freshly ground black pepper
1 cup red wine, about 1/2 bottle
3 heaping tablespoons all-purpose flour
*1.5 quart beef broth
*1 baguette, sliced and cubed for croutons  
*5 slices Gruyere
*5 slices swiss

Start by finding a giant pan. One with enough depth to hold all of the above mentioned items. Melt the butter over medium heat and add the epic amount of onions, garlic, bay leaves, fresh thyme, and salt and pepper. Let the onions cook down and caramelize (the original recipe says 25 minutes, but mine took at least 40). 

Start your croutons by cutting thick slices of bread and then cubing them. You can either toast them as is in an oven at 350 for about 10 minutes, flip and bake for another 10 OR you can throw them in a bowl, add a good drizzle of olive oil, some oregano, salt, and pepper and then bake them on a cookie sheet for about 10 minutes, flip and bake for another 10 minutes. I suggest option number 2. Just set those bad boys to the side once baked and return to the onions.


Once everything is golden and soft, add the wine (I went with a Burgundy) bring it to a boil, drop the temp to a simmer and cook until all the wine is gone. 

Florence says the onions will be dry, but just try to get most of the wine cooked out and toss out the bay leaves. Next, dust the onions with some flour. I used less than 3 Tbsp and sifted it over the onions with a fork while my roommate stirred. Cook for another 10 minutes to get rid of the raw flour taste. If your pan is big enough, go ahead and add the beef broth. If not, quickly transfer all of it to a larger pan and add your broth. If you notice, I use less broth than the Florence recipe but it is just because I really enjoy a stoupy consistency vs brothy in some of my soup. Let the soup rest on a low heat for about 10 minutes before taking on the final steps of the dish. 


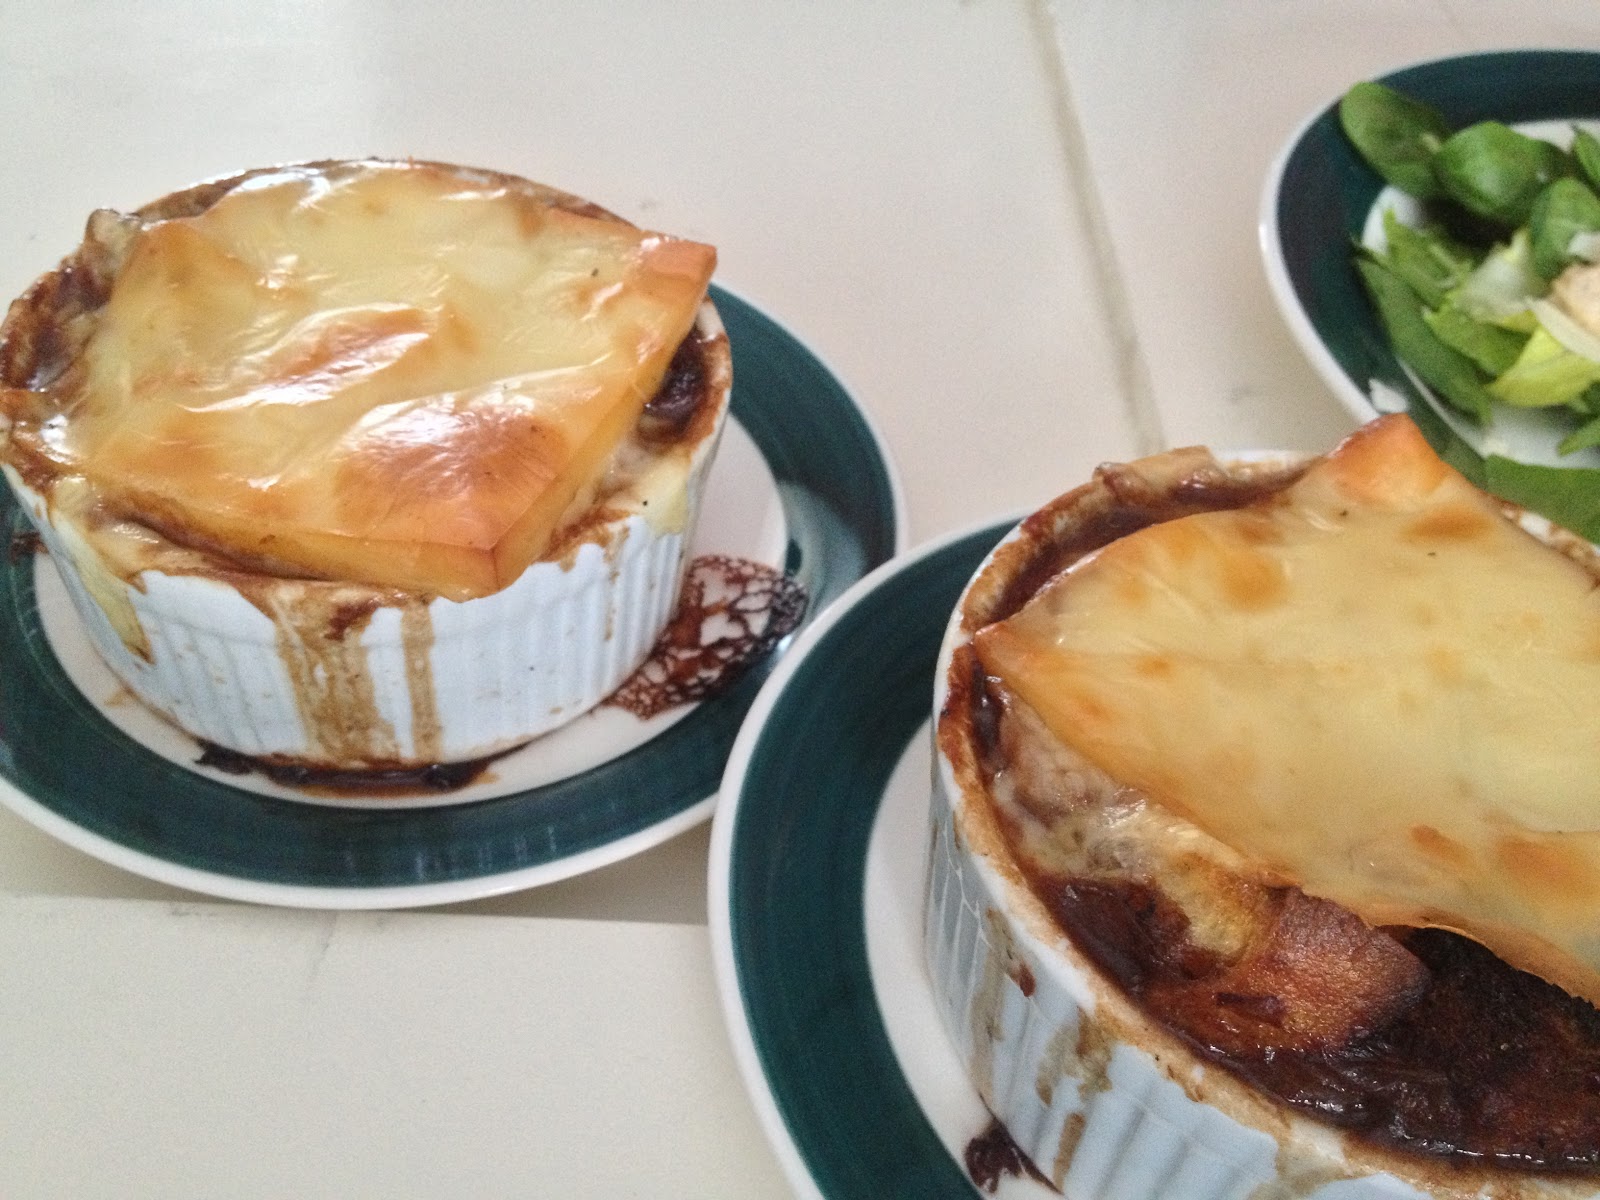
I used 5 10oz ramekins for this. You may use whatever you like, just make sure it is oven safe. first, ladle the soup into the dish, top with homemade croutons (enough to make a layer of bread on the top of the soup) and finish with the cheese (get all fancy and set the swiss slice like a diamond and the Gruyere slice like a square). Place the ramekins on a cookie sheet and pop them into the oven at 400 for about 5-10 minutes.

I wanted my cheese to really melt, not just burn on the top so I might have given it a bit more time. Finally, right before serving, crank the oven to broil and watch your cheese till it is brown and bubbly. Turn off the oven, use tongs to transfer the dishes onto a room temp place and remember that dish is hot.


We had an awesome Caesar salad, along with a great bottle of red wine and a nice fire. 

Until Next Time

Thursday, March 21, 2013

Fallen Chocolate Cake

Today I took my Mother to get her wisdom tooth removed. We walked into the dentist office and what better to be on television than Food Network. And who better to be on in a dentist office (or any medical office for that matter) than Paula Dean. Deep Fried banana foster french toast...okay not exactly deep fried, but I've never seen my french toast float in that much butter (and if it happens at Cracker Barrel I don't want to know). After that, Ina Garten comes on. As much as I dislike her warm and sunny disposition I can't help but love her food. Today was plum tart. Then I progressed to an Bon Appetit magazine and stumbled on the motherload. I think my mouth even dropped open as I gawked at the food porn. It was wonderful.
When I saw this cake recipe, I instantly thought of my friend/old roommate Mark. About halfway though our summer, he discovered he could no longer enjoy the world of gluten (and then some). So, Mark, if you are reading this you should make this cake. It is amazing. Seriously.

To everyone else, this cake is epic and completely worth every ounce of work put into it. I am still in shock at how flippin delicious this was. I would have paid $5.95 for this and tipped the crap outta the server that recommended it.

This is the recipe right out of the magazine. My tweak was toppings and making individual cakes. I took a large cupcake tin and placed a piece of buttered parchment paper in each. I tried my best to shove the paper down that it lie smoothly, but it was difficult. Also, make sure the batter touches the side with the butter.

Cake
1/2 C unsalted butter (softened) plus a little extra for greasing pan
3/4 C plus 2 Tbls Sugar (separated) along with extra for dusting
10 oz semisweet or bittersweet chocolate, coarsely chopped
2 Tbsp vegetable oil
6 eggs
2 Tbls coco powder
1 tsp vanilla extract
3/4 tsp salt

Topping
1 C chilled heavy cream
1/2 C mascarpone (room temp)
3 Tbls powdered sugar

9"- diameter springform pan

Start, as always, by preheating your oven to 350 F. Lightly butter the springform pan and dust with sugar, tapping out the excess.
  Combine chocolate, oil, and 1/2 C butter in a large heatproof bowl. Set over a saucepan of simmering water and heat, stirring often, until melted. Remove from heat.
  Separate 4 eggs, putting whites in yolks in separate medium bowls. Add coco powder, vanilla, salt, 1/4 C sugar, and remaining 2 eggs to bowl with yolks. Whisk till smooth. Gradually whisk yolk mixture into chocolate mixture, blending well.
  Using an electric mixer, beat egg whites on high until frothy. With mixer running slowly add 1/2 C sugar and beat till firm peaks form. (You can test peaks by turning off mixer, putting beater into egg whites, and lifting. If a peak forms and stays then your firm. If it starts to sag, it is soft.)
GENTLY fold egg whites into chocolate mixture in 2 batches, folding until incorporated between additions.
It should look something like this.
 
Scrape batter into pan, smooth the top and sprinkle with remaining 2 Tbls sugar. Put in the oven and bake till the top is puffed and starting to crack. The cake should be pulling away from the edge of the pan (about 35-45 minutes). If your having doubts, use the toothpick test. When done, transfer to a wire rack and let cake cool completely in the pan (sadly, the cake will collapse in the center and crack further).
 
The rise
 
And fall
 
If you put the in the muffin tins like me, let the cake cool for about 10 minutes. CAREFULLY lift the cakes from the tin, lifting from the parchment paper. Let those cool on the wire rack COMPLETELY. Very slowly and carefully peel the parchment paper from each cake (if you are serving and not saving them).
 
The naked cake
 
Topping is pretty simple. Using an electric mixer on Med-high speed, beat the chilled cream, mascarpone, and powdered sugar in a medium bowl until soft peaks form. Remove sides of springform pan from cake. Mound whipped cream mixture in center of cake.
 
I suggest adding some fruit. I used raspberries but strawberries would be good too. It is a nice contrast for such a rich cake.

I got real fancy and whipped up a chocolate sauce to drizzle over top. Chocolate syrup would do just as well.
 
Epic goodness. No joke.
 
Until Next Time